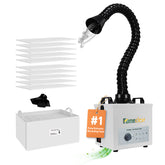
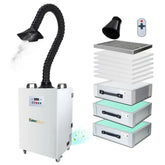
Why Your Laser Fume Extractor May Not Work as Expected (and How to Fix It)
A laser fume extractor is essential for clean, safe, and comfortable laser operations—whether you run a CO₂ laser cutter, a diode laser engraver, a fiber laser marking station, or light laser welding. If you still see haze in the enclosure, notice lingering odors, or feel eye and throat irritation after jobs, the problem isn’t always the machine itself. Most performance issues come from airflow sizing, filtration, setup, or maintenance—all fixable with the right steps. This in-depth guide explains why a fume extractor for laser might underperform and how to restore top-tier results with practical, workshop-tested fixes.
1) Airflow Is Too Low for Your Laser Setup
Airflow (CFM or m³/h) determines how quickly smoke is pulled away from the beam and into the filter. If airflow is undersized or restricted, smoke escapes the capture zone. This is the #1 reason a laser cutter fume extractor appears “weak.”

Recommended Airflow Targets
These are practical starting points; actual needs vary by enclosure design, material, duty cycle, and capture distance.
| Laser Type / Typical Power | Recommended Airflow (CFM) | Typical Use |
|---|---|---|
| Diode Laser (≤20W) | ≥ 100–150 CFM | Small engraving, hobby materials |
| CO₂ Laser (40–80W) | ≥ 250 CFM | Cutting acrylic, plywood, signage |
| CO₂ Laser (100–150W) | ≥ 400 CFM | Heavier cutting, thicker acrylic/wood |
| Fiber Laser / Light Laser Welding | ≥ 500–600+ CFM | Metal marking, deep engraving, welding fumes |
Fix: Match extractor CFM to your machine and duty cycle; keep duct runs short and straight; minimize static pressure losses from tight bends or small-diameter hoses.
Tip: If smoke returns to the room after the job, run the extractor for 2–5 minutes post-job to flush residual fumes.
2) Filters Are Saturated or the Wrong Type
A proper laser fume filter stack removes both particles and gases. Particles are captured by pre-filters and HEPA media; gases and odors (VOCs) are adsorbed by activated carbon. If any stage is missing or saturated, you’ll notice reduced capture and odor breakthrough.

Recommended Filter Replacement Cycles
| Filter Stage | Primary Function | Replacement Guideline | Symptoms of Saturation |
|---|---|---|---|
| Pre-filter | Capture large dust and debris | Every 10–15 days (heavy use) or when visibly dirty | Rapid loading; visible dust; airflow drop |
| HEPA filter | Capture ≥99.97% of ≥0.3 µm particles | Every 1–2 months (usage dependent) | Fine dust passing; haze despite airflow |
| Activated carbon | Adsorb VOCs, solvent & acrylic odors | Every 3–6 months; earlier if odor returns | Odor breakthrough during/after jobs |
Fix: Use the full stack (pre-filter + HEPA + carbon). Replace on schedule, and sooner for acrylic, leather, or resin-heavy work that loads carbon quickly. Keep spare pre-filters on hand—they protect expensive HEPA/carbon stages.
3) Hood or Hose Placement Is Ineffective
Even a powerful laser smoke extractor can’t capture fumes if the hood is too far from the source or pointed the wrong way. Capture velocity decays quickly with distance.

- Place the hood within 5–10 cm (2–4 inches) of the plume.
- Avoid sharp bends; use stable arms or brackets to lock position.
- Use appropriate hood geometry (flanged hoods reduce re-entrainment).
4) Room Drafts and Poor Sealing Fight Your Capture
Open doors, fans, HVAC outlets, or leaky enclosures can push smoke away from the capture zone. You’ll see smoke curling or drifting instead of flowing cleanly to the hood.
- Close unnecessary doors/windows during jobs.
- Seal hose joints with clamps/gaskets to stop leaks.
- Balance room air so extraction doesn’t create disruptive cross-flow.

5) Hose Length, Diameter, and Routing Reduce Suction
Long, narrow, or corrugated hoses add static pressure and eat up your CFM. Every 90° elbow is a penalty. Keep the run short, smooth, and appropriately wide.
- Target ≤ 2 m (≈6.5 ft) total run when possible.
- Use 75–90 mm inner diameter for small/medium systems.
- Prefer smooth-wall hose over deep-corrugation ducting.

6) Maintenance Is Overdue
Dust inside the housing, clogged pre-filters, and debris on blower blades all reduce performance—and increase noise. A simple schedule keeps capture consistent.
| Task | Frequency | What to Check |
|---|---|---|
| Pre-filter swap | Weekly / every 10–15 days | Loading, discoloration, pressure drop |
| HEPA inspection | Monthly | Excess resistance, bypass paths, seal integrity |
| Carbon refresh | Every 3–6 months | Odor breakthrough during/after jobs |
| Blower cleaning | Quarterly | Dust on blades, unusual vibration/noise |
| Hose & joints | Monthly | Kinks, leaks, cracked cuffs |

7) Operation & Settings Undercut Efficiency
Running the fan at the lowest setting to save noise or power often leaves fumes behind. Turning the extractor off the moment a job ends traps smoke in the enclosure.
- Use a fan speed that visibly pulls a small tissue at the hood (“tissue test”).
- Run 2–5 minutes post-job to clear residual fumes.
- Avoid moving the unit while running; it can shift hose positions and leak paths.
If you frequently cut acrylic or materials with strong VOCs, carbon will saturate faster—shorten the replacement interval.
Material-Specific Notes (CO₂, Fiber, Diode)
CO₂ Laser Cutting & Engraving
Acrylic, plywood, MDF, leather, and rubber produce visible smoke and strong odors. For these, a co2 laser fume extractor with generous carbon mass and steady capture is crucial. Keep the hood close and avoid long hose runs.
Fiber Laser Marking
Metal marking produces fine particulates and ozone/odors depending on coatings. A fiber laser fume extractor benefits from high-efficiency HEPA and stable hood geometry near the plume.
Diode Laser Engraving
Desktop diode units still create VOCs and particulates on wood, leather, and painted surfaces. Even small systems need a correctly sized diode laser fume extractor with multi-stage filtration.
Laser Welding
Fumes are intense and localized. A laser welding fume extractor requires higher CFM and rigid positioning to capture at the arc/beam.

Quick Diagnostic Checklist
- ✅ Airflow test: Tissue pulls strongly at the hood.
- ✅ Filters: Pre-filter not caked; HEPA intact; carbon not odorous.
- ✅ Placement: Hood 5–10 cm from source; aimed into plume.
- ✅ Hose run: Short, wide, smooth; minimal elbows.
- ✅ Room: No strong cross-drafts; joints sealed.
- ✅ Operation: Adequate fan speed; post-run 2–5 minutes.

Case Study: From Persistent Haze to Clear Air

A maker-space running a 60W CO₂ laser struggled with haze and acrylic odor despite having an extractor. Inspection showed a fully loaded pre-filter, a HEPA near end-of-life, and a carbon stage that had lost capacity. The hood was also 25–30 cm from the workpiece with two sharp elbows in the hose.
They implemented the following:
- Swapped the filter set (fresh pre-filter, HEPA, and higher-capacity carbon).
- Moved the hood to 8 cm from the focal point and re-aimed into the plume.
- Re-routed the hose: one gentle sweep instead of two tight elbows; widened to 90 mm ID.
- Added a 3-minute post-run on every job.
Result: visible smoke dropped dramatically, odor was reduced by an estimated 90% during and after jobs, and operator comfort improved immediately. The extractor also ran quieter due to lower static pressure.
Ready to Improve Your Setup?
Explore high-airflow, multi-stage systems and accessories to optimize capture for CO₂, diode, and fiber applications: Laser Fume Extractor Collection.
FAQ
Why do I still smell burnt acrylic after a cut?
Odor breakthrough means your carbon is saturated or capture velocity is low at the source. Replace the carbon stage sooner and bring the hood within 5–10 cm; verify sufficient CFM for your laser power.
Is a DIY laser fume extractor enough?
A DIY solution may help for small diode lasers. For CO₂ and fiber systems, you need a professional multi-stage stack (pre-filter + HEPA + activated carbon) and adequate airflow to protect operators and optics.
Should I add external exhaust?
If odor remains with fresh carbon, an external exhaust can remove vapors entirely. Keep any added duct short and smooth to maintain CFM at the hood.
How close should the hood be?
Typically 5–10 cm (2–4 in) from the plume, angled into the flow. Closer improves capture; too far and velocity drops off quickly.


